Stretching is super helpful, especially when you’re hiking. I’ve noticed that stretching makes me stronger and more confident on the trail. It even helps prevent common hiking injuries like muscle strains and sprains.
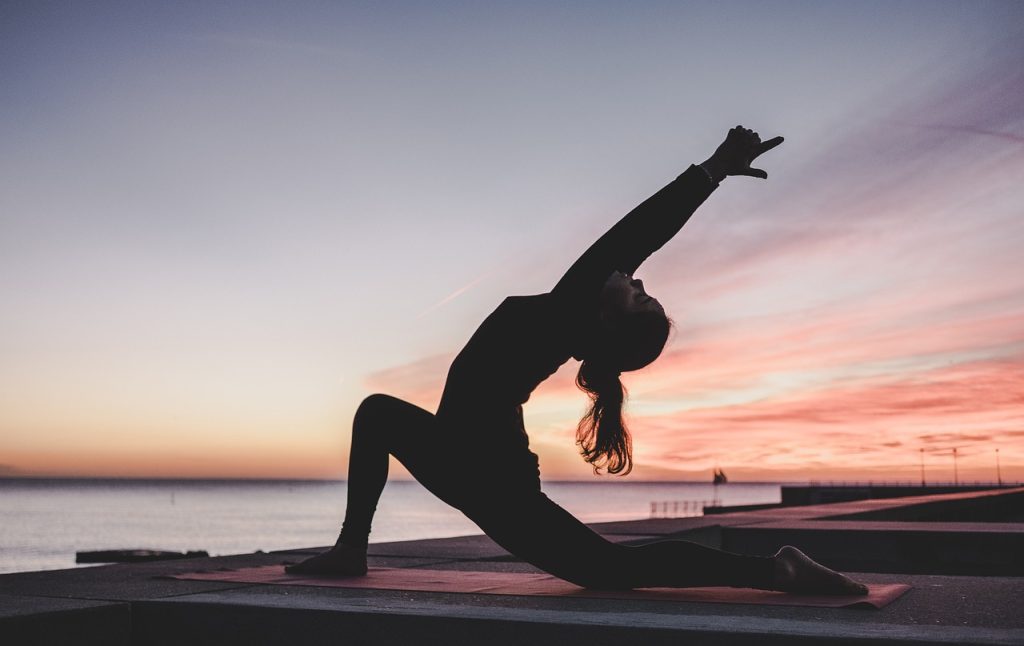
Some people might think yoga is all about tricky poses like headstands or chanting on a mountaintop, but it doesn’t have to be that way. Yoga can be as simple as doing a few basic stretches, and you can do them anywhere—even at your campsite! That’s actually how I like to do it.
If you want to keep your body feeling great and avoid getting hurt, I’ll share some easy stretches you can do before, during, and after your hike. These stretches will help protect your body from the long days on the trail.
Yoga Isn’t Just for Hikers
While this yoga sequence is fantastic for hikers, its true strength is how it targets key muscles like the outer hips, hip flexors, and chest.
As a blogger, this is my favorite yoga flow because, no matter how much I try to change positions while working, I still end up spending way too many hours with tight hips, rolled-in shoulders, and a forward head.
Breathing is Key
Close your lips and breathe slowly through your nose, taking about 5 seconds to inhale and another 5 seconds to exhale. As you exhale, focus on letting go of any tension and relaxing your muscles. With practice, you’ll feel like your breath is helping you sink deeper into each pose.
Strong Posture
When we hike, it’s easy for our posture to slump—our shoulders roll forward, our neck drops to watch the trail, and our lower back arches. To help with this, keep these posture tips in mind when doing yoga poses:
- Align your ears with your shoulders.
- Draw your shoulder blades down your back and toward each other.
- Keep your spine long, especially through your neck.
- Lift your chin slightly.
- Pull your belly toward your spine.
Twist and Open
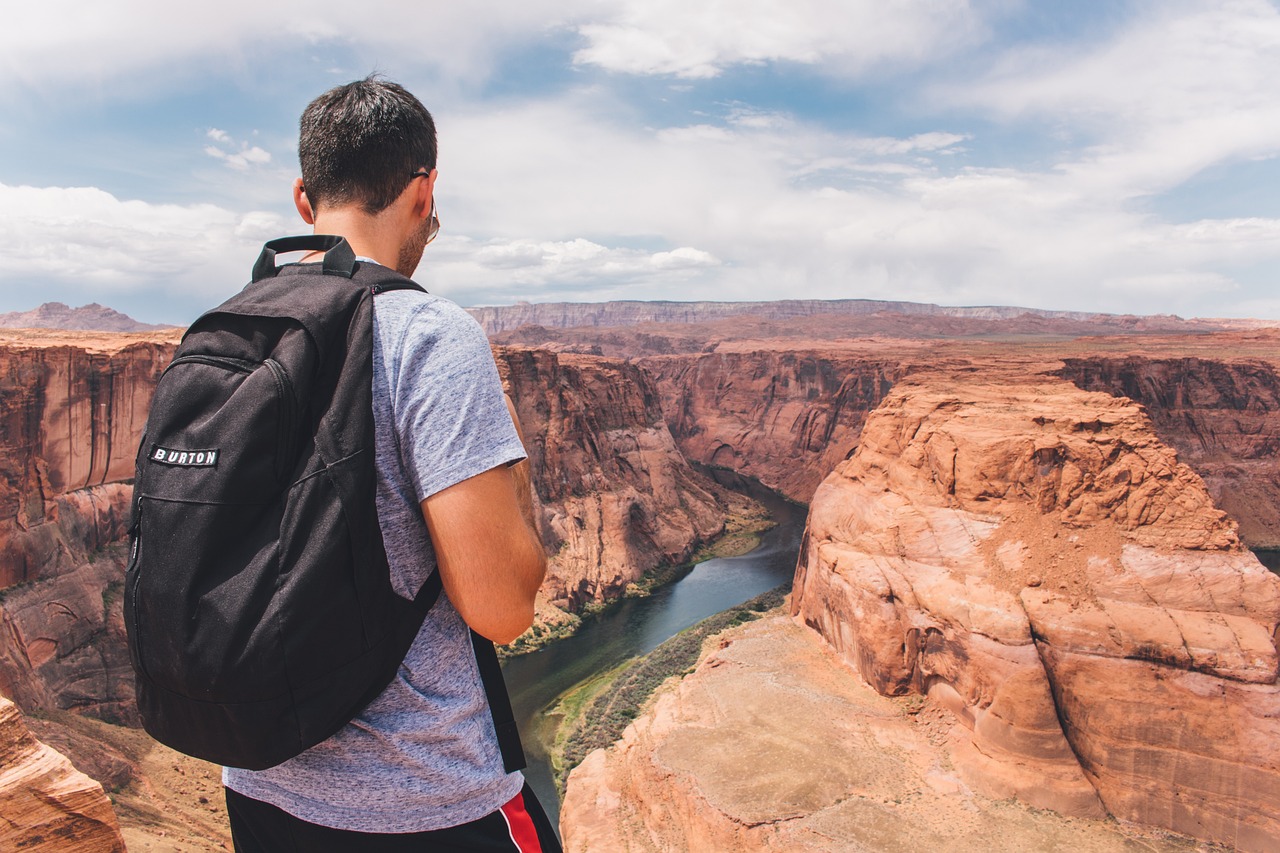
When you hike, the repetitive bending at your hips and the weight of a heavy backpack can cause your chest, hip flexors, and quads to tighten. Plus, the side-to-side movement of your hips and spine makes the muscles along your lower back work extra hard. That’s why my favorite yoga poses include a lot of hip and chest openers, along with plenty of twisting to counteract this natural movement on the trail.
These poses are more advanced, so take your time easing into them and be mindful of your breath while holding each one.
Move Smoothly
I’ve connected these poses to create a complete practice for you. The sequence is designed to help you twist and untwist your spine while stretching different muscle groups in turn. By the end, you should feel fantastic!
Yoga for Hikers: Hips and Chest Sequence
1: Angled Child’s Pose
- Start on Your Knees: Begin by kneeling on your mat, bringing your toes to touch.
- Widen Your Knees: Spread your knees out wide.
- Drape Forward: Lower your belly onto your thighs and extend your arms straight out before you.
- Breathe: Hold this position and focus on connecting with your breath.
- Side Stretch: Walk your hands off your mat to the left side. Apply gentle pressure with your left hand and try to press your right hip back toward your right heel.
- Hold and Switch: Stay in this position for 5 breath cycles, then switch sides.
- Step Forward: After completing both sides, step your right foot forward and continue through poses 2 to 8.
2: Runner’s Lunge with Chest Opener
- Step Forward: Step your right foot between your hands, making sure your right ankle is directly underneath your right knee.
- Interlace Hands: Interlace your hands behind your back, or use a strap if needed.
- Engage Your Core: Tuck your hips under and pull your abs in while you lunge forward.
- Hold the Pose: Stay in this position for 5 breath cycles, then move on to the next pose.
3: Quadruped with Quad Opener
- Position Your Hand: Place your left hand under your left shoulder for support.
- Extend Your Leg: Extend your right leg back behind you.
- Reach and Capture: Reach back with your right hand to grab your right foot.
- Open Your Chest: Open your chest towards the ceiling as you gently kick your foot into your hand.
- Engage Your Core: Keep your left-hand light by engaging your left obliques.
- Hold the Pose: Stay in this position for 5 breath cycles, then transition to the next pose.
4: Runner’s Lunge with Twist
- Step Forward: Step your right foot up so it’s even with your left hand.
- Lift and Straighten: Lift your back knee off the mat and straighten your back leg.
- Square Your Hips: Keep your hips squared to the front of your mat.
- Rotate Shoulders: Rotate your shoulders, aiming to stack your right shoulder on top of your left shoulder.
- Extend and Open: Extend your right arm upward and spin your chest toward the ceiling.
- Engage Your Core: Keep your core engaged while holding the pose for 5 breath cycles, then move on to the next pose.
5: Half Split with Pronator Stretch
- Lower Your Back Knee: Gently drop your back knee down onto the mat again.
- Straighten Your Right Leg: Straighten your right leg, pushing your right hip back to align with your left hip.
- Flex Your Foot: Flex your right toes towards your face as you hinge forward over your right leg.
- Position Your Hands: Place both hands on the outside of your right leg.
- Hold the Pose: Stay in this position for 5 breath cycles, then proceed to the next pose.
6: Runner’s Lunge with Quad Opener
- Rebend Your Right Knee: Shift your weight forward by bending into your right knee again.
- Bend Your Left Knee: Bend your left knee, bringing your left foot toward your body.
- Reach Back: Reach back with your left hand and capture the inside of your left foot, with your left thumb pointed toward your left big toe.
- Hold the Pose: Maintain this position for 5 breath cycles, then transition to the next pose.
7: Pyramid Pose
- Lift and Straighten: Lift your left knee off the mat and straighten both legs.
- Position Your Feet: Stand with your right toes pointing forward and your left toes turned out at a 45-degree angle. Keep your feet hip-width apart.
- Square Your Hips: Ensure your hip bones are square to the front of your mat.
- Hinge Forward: With a flat back, hinge forward over your right leg. Use a block for support if needed.
- Hold the Pose: Stay in this position for 5 breath cycles, then proceed to the next pose.
8: Reverse Triangle Pose
- Stand Tall: Stand up straight and scoot your back foot back a few more inches.
- Pivot Your Left Foot: Turn your left foot to 90 degrees so it’s perpendicular to your right foot, aligning the arch of your left foot with the heel of your right foot.
- Reach Down: Slide your left hand down your left leg while reaching your right arm up toward the sky.
- Hold the Pose: Maintain this position for 5 breath cycles, then transition to the next pose.
9: Wide Stance Forward Fold with Shoulder Opener or Twist
- Turn Your Hips: Rotate your hips so that you’re facing sideways on your mat.
- Position Your Feet: Point all ten toes toward the long edge of your mat, or slightly inward.
- Forward Fold: With a flat back, fold forward, then let your head hang heavy for 5 breaths. You can interlace your hands behind your back if you like.
- Twist and Reach: Grab the outside of your left foot or calf with your right hand. Keep your hips even as you extend your left arm toward the ceiling.
- Open Your Chest: Roll your chest open, aiming to stack your left shoulder on top of your right one.
- Hold the Pose: Stay in this position for 5 breath cycles, then repeat the twist with your left hand grabbing your right foot.
10: Downward Facing Dog with Quad Opener
- Start in Downward Dog: Begin in a downward-facing dog position.
- Extend Your Right Leg: Lift your right leg into the air.
- Open Your Hip: Stack your right hip on top of your left hip to open it.
- Bend and Drop: Bend your right knee and let your right foot fall toward your left hip.
- Hold and Circle: Stay in this position for 5 breaths. If it feels good, make some small circles with your right knee.
- Return and Transition: Place your right foot back on the ground and move on to the next pose.
11: Downward Facing Dog with a Twist
- Start in Downward Dog: Begin in a downward-facing dog position.
- Reach Your Hand: Extend your right hand to the outside of your left calf.
- Gaze Under: Look under your left armpit.
- Maintain Alignment: Keep your hips and shoulders even while holding the pose for 5 breaths.
- Repeat: Switch sides and repeat poses 10 and 11 on the other side.
12: Pigeon Pose
- Start in Downward Dog: Begin in a downward-facing dog position.
- Swing Your Foot Forward: Bring your right foot forward so that your right knee is behind your right wrist and your right foot is behind your left wrist.
- Square Your Hips: Place a blanket or block under your right hip if needed to keep your hips square.
- Fold Over: If your hips are very tight, your shin might not be parallel to the front of your mat. Fold your right shin and rest your forehead on your forearms.
- Hold the Pose: Stay in this position for 5 breaths. If your hips are very tight, set a timer for 2 minutes and relax.
13: Plow Pose
- Lift Your Feet: Raise both feet over your head to a comfortable range of motion.
- Check for Discomfort: If you feel discomfort in your back or neck, either skip the pose or support your feet with a blanket. You can also support your lower back with your hands or a block.
- Hold the Pose: Stay in this position for 5 or more breaths.
- Roll Out Slowly: When you’re ready, roll out of the pose slowly and carefully.
14: Supine Twist
- Lie Down: Start by lying on your back with both legs extended on the floor.
- Bring Knee to Chest: Pull your right knee toward your chest and squeeze it while flexing your left toes toward your face.
- Use a Strap: Place a strap around your right foot and extend your right leg up toward the ceiling.
- Twist and Drop: Hold the strap with your left hand and gently drop your right leg over to the left side of your mat.
- Adjust Your Hips: Tuck your left hip under your right hip.
- Extend Your Arm: Stretch your right arm out to the right, aiming to keep your right shoulder on the ground.
- Hold the Pose: Stay in this position for 5 or more breaths, then repeat the sequence on the other side.
15: Savasana (Relaxation Pose)
- Lie Down: Lie flat on your back with your legs extended straight on the floor and your toes rolling outward.
- Position Your Arms: Place your arms by your sides with your palms facing upward.
- Adjust Your Shoulders: Draw your shoulder blades down and together, tucking them under you to allow your chest to expand.
- Relax and Reflect: Imagine the weight of the world melting away as you relax. Soak in gratitude for your amazing hikes and the beautiful planet we live on.
FAQ:
Why is Stretching Good for Hikers?
Stretching offers many benefits for hikers. Here are three key reasons why I include stretching in my hiking routine:
1. Reduce the Risk of Injury:
Hiking can aggravate old injuries or cause new aches if you’re not careful. Regular stretching helps keep your muscles flexible and reduces the risk of injuries, allowing you to enjoy more time on the trails without discomfort.
2. Improve Stability and Balance:
Good balance and stability are crucial, especially on uneven terrain and with a heavy pack. Stretching helps improve these aspects, reducing the chances of falls, rolled ankles, and fatigue.
3. Increase Flexibility:
Stretching enhances flexibility, which can alleviate muscle strain and aches during and after hikes. Flexibility helps your body handle the demands of hiking more comfortably.
While stretching is essential, it’s also important to include strength-building exercises. Flexibility alone without muscle strength can lead to injuries.
Do I Need to Stretch Every Day?
There’s no strict rule about how often to stretch. However, to see improvements in strength and flexibility, stretching before, during, and after hikes is recommended. If you can, incorporating regular yoga practice into your routine will provide even greater benefits.
What if I’m Not Flexible?
If you find stretching challenging due to tight or stiff muscles, don’t worry about being flexible. Focus on maintaining a healthy range of motion that keeps you active and pain-free. Small, consistent efforts can lead to significant improvements over time. Think of stretching like brushing your teeth—simple but effective!
Recommended Yoga or Stretching Apps:
For a good stretching or yoga app, I recommend Down Dog. It offers a range of options and flexibility in your practice with a subscription ($10/month or $60/year). The Yin Yoga sessions are excellent for deep stretching, and Restorative Yoga is great for relaxing after a hike.