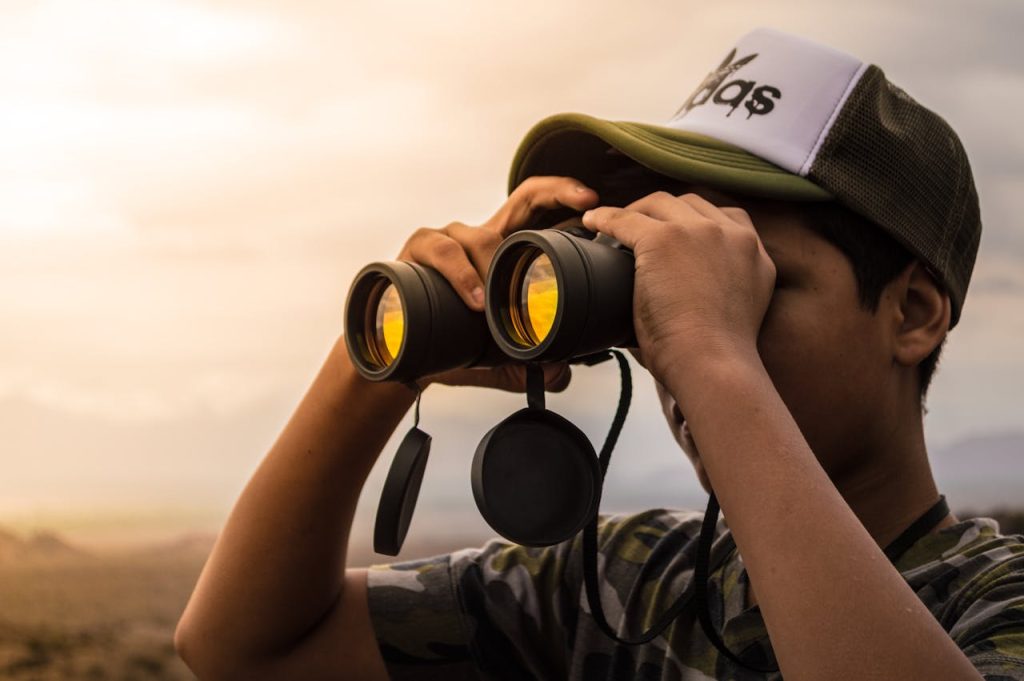
Binoculars are amazing tools that make faraway things look closer, clearer, and more exciting. Whether you’re watching birds, stargazing, or hiking through nature, the right pair of binoculars can open up a whole new world. But with so many options out there, how do you choose the right one?
Picking binoculars might seem tricky, but it’s easier than you think when you know what to look for. In this guide, we’ll explore everything you need to know about binoculars, from understanding their specs to testing them out, so you can make the best choice for your adventures.
Choosing the right pair of binoculars is essential for hikers, birdwatchers, and outdoor enthusiasts looking to enhance their adventures. Here’s a guide to help you make an informed purchase:
1. Consider Magnification and Objective Lens Size
The two numbers on binoculars, such as 8×42, represent magnification (8x) and the diameter of the objective lens in millimeters (42). Higher magnification brings objects closer but can make the image shakier. A good balance for most outdoor activities is 8x or 10x magnification, paired with an objective lens size of 30–50mm for clear and bright images.
2. Prioritize Lens Quality and Coatings
Lens coatings reduce glare and improve light transmission, offering brighter and sharper views. Look for fully multi-coated lenses for the best performance. Binoculars with high-quality lenses, like ED (extra-low dispersion) glass, provide excellent color accuracy and minimal distortion.
3. Check Weight and Size
For hikers, lightweight and compact binoculars are ideal, as they’re easier to carry. However, smaller models may sacrifice brightness. Strike a balance between portability and optical performance based on your needs.
4. Look for Durability
Outdoor binoculars should be waterproof and fog-proof to handle changing weather conditions. Rubber armor provides a secure grip and adds shock resistance.
5. Test Comfort and Adjustability
Binoculars should feel comfortable in your hands and on your face. Adjustable eyecups are a must for eyeglass wearers, while a smooth focus wheel ensures quick adjustments.
6. Set Your Budget
Prices can range from $50 to over $2,000. Decide your budget based on how often you’ll use them and the features you need.
By keeping these tips in mind, you’ll find binoculars that perfectly match your outdoor adventures!
Understanding Binocular Specs
When shopping for binoculars, understanding the specifications is crucial to making the right choice. The numbers and terms on binoculars can seem confusing, but they reveal essential details about performance. Here’s what you need to know:
1. Magnification and Objective Lens Size
Binoculars are labeled with two numbers, like 8×42. The first number (8x) is the magnification, meaning the object appears eight times closer than with the naked eye. The second number (42) is the diameter of the objective lens in millimeters. Larger lenses gather more light, resulting in brighter images, especially in low-light conditions, but they can also make the binoculars heavier.
2. Field of View (FOV)
Field of view refers to the width of the area visible through the binoculars, usually measured in feet at 1,000 yards or in degrees. A wider FOV is ideal for tracking moving objects, like wildlife or birds.
3. Exit Pupil
Exit pupil is calculated by dividing the objective lens size by the magnification (e.g., 42 ÷ 8 = 5.25mm). This number indicates how much light reaches your eye. A larger exit pupil is better for low-light conditions, such as dawn or dusk.
4. Lens Coatings
Coatings on the lenses improve light transmission, reduce glare, and enhance image clarity. Look for terms like “multi-coated” or “fully multi-coated,” which indicate superior coatings.
5. Eye Relief
Eye relief is the distance between your eye and the eyepiece while still seeing the full image. This is particularly important for eyeglass wearers. Longer eye relief (15mm or more) ensures comfortable viewing.
6. Prism Types
Binoculars use either Porro prisms or roof prisms. Porro prism binoculars are bulkier but offer better depth perception, while roof prism models are compact and streamlined.
By understanding these specs, you can confidently select binoculars that meet your needs!
Understanding the Optics of Binoculars
The optics of binoculars are at the heart of their performance, determining image clarity, brightness, and overall quality. Here’s a breakdown of the key optical components and how they work:
1. Objective Lenses
The large lenses at the front of binoculars, called objective lenses, gather light to create an image. The size of these lenses, measured in millimeters, plays a major role in image brightness. Larger lenses collect more light, making them ideal for low-light conditions, but they also add to the weight and bulk of the binoculars.
2. Magnification Power
Magnification, noted as the first number in specifications (e.g., 8×42), indicates how much closer the object appears. Higher magnification may seem desirable, but it can reduce image stability and brightness, especially without a tripod. Opt for moderate magnification, such as 8x or 10x, for balanced performance.
3. Prisms and Their Role
Binoculars use prisms to flip the image, as lenses alone produce an upside-down view. Two main types of prisms are used:
- Porro prisms: Deliver superior depth perception and wider fields of view but are bulkier.
- Roof prisms: Offer a sleeker, more compact design but can be more expensive to achieve the same optical quality.
4. Lens Coatings
Optical coatings improve light transmission and reduce glare, resulting in sharper and brighter images. Terms like “multi-coated” or “fully multi-coated” indicate advanced coatings, which are crucial for reducing reflections and enhancing color fidelity.
5. Exit Pupil and Brightness
The exit pupil, calculated by dividing the lens diameter by magnification, determines how much light reaches your eye. A larger exit pupil provides brighter views, especially in dim conditions like dawn or dusk.
By understanding these optical elements, you can better evaluate the quality and suitability of binoculars for your specific outdoor needs.
Protection Features for Binoculars
When investing in binoculars, it’s important to ensure they can withstand the demands of outdoor adventures. Protection features safeguard your binoculars from harsh weather, accidental drops, and challenging environments. Here are key features to look for:
1. Waterproofing
Waterproof binoculars are essential for outdoor activities, especially in unpredictable weather or wet environments like rainforests or near bodies of water. Look for models labeled with an IPX rating (e.g., IPX7 or IPX8), which indicates resistance to water submersion. Sealed O-rings ensure moisture doesn’t penetrate the internal components.
2. Fog-Proofing
Temperature changes, such as moving from a warm car to a cold trail, can cause internal fogging. Fog-proof binoculars are filled with nitrogen or argon gas, preventing condensation inside the lenses. This feature is particularly useful for maintaining clear views in humid or cold conditions.
3. Shock Resistance
Binoculars designed with shock-resistant features, like rubber armor or reinforced casings, can withstand accidental drops or bumps. The rubber armor not only absorbs impact but also provides a secure grip, reducing the chance of slipping.
4. Dust and Debris Protection
In dusty environments like deserts, sealed binoculars prevent tiny particles from infiltrating the internal mechanisms, which could damage the optics over time. Lens caps and carrying cases also help protect your binoculars when not in use.
5. UV Protection
Some binoculars come with lenses that block harmful UV rays, reducing eye strain during prolonged use in bright sunlight.
6. Scratch-Resistant Coatings
High-quality binoculars often feature scratch-resistant coatings on the lenses, ensuring durability and maintaining image clarity even with frequent use.
By choosing binoculars with these protection features, you’ll extend their lifespan and enjoy uninterrupted performance, no matter the conditions you face on your outdoor adventures.
How to Focus Your Binoculars
Properly focusing your binoculars is essential for achieving a sharp and clear view of your target. Follow these steps to ensure optimal performance:
1. Adjust the Eye Cups
Start by setting the eye cups to match your viewing preference. If you wear glasses, twist the eye cups down to accommodate your glasses. If not, keep them twisted up to provide the correct eye relief and minimize light leakage.
2. Set the Interpupillary Distance (IPD)
The distance between the two eyepieces, called the interpupillary distance, must match the distance between your eyes. Hold the binoculars up and adjust the central hinge until you see a single, round image through both lenses.
3. Focus the Left Eye
- Close your right eye or cover the right lens.
- Look through the left eyepiece at a stationary object in the distance.
- Use the central focus wheel to adjust until the image is sharp and clear for your left eye.
4. Adjust the Right Eye with the Diopter
- Close your left eye or cover the left lens.
- Look through the right eyepiece and use the diopter adjustment (a separate focus ring near the right eyepiece) to bring the object into focus for your right eye.
5. Fine-Tune with Both Eyes Open
Once both lenses are individually focused, open both eyes and use the central focus wheel to make any final adjustments. This step ensures a crisp image for both eyes simultaneously.
6. Practice on Different Distances
Switch between objects at various distances to get comfortable with refocusing. This is especially useful for activities like birdwatching or wildlife observation, where targets may be constantly moving.
With these steps, you’ll achieve a clear, detailed view and make the most of your binoculars in any outdoor setting.
How to Test Out Binoculars
Testing binoculars before purchasing ensures they meet your needs and perform well in real-world conditions. Here’s a step-by-step guide to evaluating binoculars:
1. Assess Comfort and Build
Hold the binoculars to see if they feel comfortable in your hands. Check the weight and balance—binoculars that are too heavy or poorly balanced may become tiring during extended use. Ensure the grip is secure and the materials feel durable.
2. Check the Eye Cups and Fit
Adjust the eye cups to match your preference, whether you wear glasses or not. Test how they sit against your face to ensure a proper seal with minimal light interference. Eye relief is especially important for eyeglass wearers—make sure you can see the entire field of view without straining.
3. Test the Focus Mechanism
Rotate the central focus wheel and diopter adjustment to check for smoothness and precision. Ensure the mechanism isn’t stiff or overly loose, as this affects your ability to quickly adjust focus during use.
4. Evaluate Image Quality
View objects at varying distances and evaluate the image clarity, brightness, and sharpness. Look for details in the center and edges of the image to detect any distortion. Test in both bright and low-light conditions, as high-quality binoculars should perform well in dim settings.
5. Assess Field of View (FOV)
Observe a moving object, like birds or vehicles, to test the binoculars’ field of view. A wide FOV makes it easier to track motion.
6. Look for Chromatic Aberration
Focus on high-contrast areas, like tree branches against a bright sky, to check for color fringing or halos (chromatic aberration). High-quality lenses should minimize this issue.
By thoroughly testing binoculars for comfort, focus, and image quality, you can confidently select a pair that suits your outdoor adventures.


